This page is part of archived documentation for openHAB 3.2. Go to the current stable version
# openHAB on Linux
The following instructions will guide you through the process of setting up openHAB and recommended packages for both .DEB (Ubuntu, Debian etc.) and .RPM (RedHat, CentOS, Fedora etc.) Linux systems.
All instructions can be executed in a terminal or remotely via SSH connection.
This page is structured as follows:
If you are unfamiliar with Linux, SSH and the Linux console or if you want to improve your skills, read up on these important topics. A lot of helpful articles can be found on the internet, for example:
- "Learn the ways of Linux-fu, for free" interactively with exercises at linuxjourney.com (opens new window).
Linux file permissions is one of the biggest sources of issues, Linux novices run into.
If you find yourself in a situation, where you have no write access to the openHAB configuration or system files wrong permissions and/or the incorrect use of sudo are often the cause.
Train your understanding of Linux permissions at linuxjourney.com/lesson/file-permissions (opens new window).
# Meeting the Requirements
As a first step, please verify, that your system meets the prerequisites. You may want to install Zulu, a fully certified Java build as a package or manually (opens new window).
Alternatively, Zulu Embedded can be installed for small systems either from the same package repository as above or manually (opens new window).
If you're unsure which manual file you should download, using dpkg --print-architecture or rpm -q --qf '%{ARCH}\n' rpm in your Linux terminal should point you in the right direction (e.g. armhf means ARM Hard Float).
When installing Zulu or Zulu Embedded from a .zip or .tar archive, make sure to set Zulu as the main Java "alternative" (opens new window).
Note
Make sure to download Zulu or Java 11.
# Installation
openHAB can be installed through
- the openHABian project (easiest method, ships with the openHABian configuration tool)
- a package repository (apt, yum)
- manually from file.
The installation through the openHABian project and the use of the provided openHABian configuration tool is recommended for end users.
Installing using the provided package repository (using apt, apt-get, yum or dnf) is easier, but requires more manual configuration later on due to the missing openHABian configuration tool.
The manual installation through a platform independent archive file is suited for users who know what they are doing.
# openHABian project
The easy step by step instruction can be found here.
# Package Repository Installation
Installation through a package repository is the recommended choice. You can select the appropriate installation instructions by expanding from the apt or yum instructions. Alternatively resort to the manual installation approach.
# Apt Based Systems
First, add the openHAB repository key to your package manager:
wget -qO - 'https://openhab.jfrog.io/artifactory/api/gpg/key/public' | sudo apt-key add -
Then, you can choose between, Official (Stable), Beta or Snapshot builds:
Stable Release
The stable builds contain the latest official release with tested features.
Add the openHAB Stable Repository to your systems apt sources list:
echo 'deb https://openhab.jfrog.io/artifactory/openhab-linuxpkg stable main' | sudo tee /etc/apt/sources.list.d/openhab.listTesting Release
The beta and release candidate builds come out less frequently, but will contain new features that are currently in the testing phase.
Add the openHAB Beta Repository to your systems apt sources list:
echo 'deb https://openhab.jfrog.io/artifactory/openhab-linuxpkg testing main' | sudo tee /etc/apt/sources.list.d/openhab.listSnapshot Release
The snapshot build is created almost daily (opens new window), and include the latest changes to the openHAB core and add-ons. These changes are often unstable, so you should use this branch only for testing or development purposes.
The snapshot repository is hosted in openHAB's JFrog Artifactory instance (opens new window). To use it, add the openHAB Unstable Repository to your systems apt sources list:
echo 'deb https://openhab.jfrog.io/artifactory/openhab-linuxpkg unstable main' | sudo tee /etc/apt/sources.list.d/openhab.list
Next, resynchronize the package index:
sudo apt-get update
Now install openHAB with the following command:
sudo apt-get install openhab
When you choose to install an add-on, openHAB will download it from the internet on request. If you plan on disconnecting your machine from the internet, then you will want to also install the add-ons package.
sudo apt-get install openhab-addons
# Yum or Dnf Based Systems
The RPM repo information should be defined inside a file, make a new file at /etc/yum.repos.d/openhab.repo with the following contents depending on your choice of release.
You may add all three to the same file, but make sure the desired repo is is set to enabled=1:
Stable Release
The stable builds contain the latest official release with tested features.
[openHAB-Stable]
name=openHAB Stable
baseurl=https://openhab.jfrog.io/artifactory/openhab-linuxpkg-rpm/stable
gpgcheck=1
gpgkey="https://openhab.jfrog.io/artifactory/api/gpg/key/public"
enabled=1
Testing Release
The beta or release candidate builds come out less frequently, but will contain new features that are currently in the testing phase.
[openHAB-Testing]
name=openHAB Testing
baseurl=https://openhab.jfrog.io/artifactory/openhab-linuxpkg-rpm/testing
gpgcheck=1
gpgkey=https://openhab.jfrog.io/artifactory/api/gpg/key/public
enabled=1
Snapshot Release
The snapshot build is created almost daily (opens new window), and include the latest changes to the openHAB core and add-ons. These changes are often unstable, so you should use this branch only for testing or development purposes.
[openHAB-Snapshots]
name=openHAB Snapshots
baseurl=https://openhab.jfrog.io/artifactory/openhab-linuxpkg-rpm/unstable
gpgcheck=1
gpgkey=https://openhab.jfrog.io/artifactory/api/gpg/key/public
enabled=1
Now install openHAB with the following command, please note that for systems that support it dnf can be used instead of yum:
sudo yum install openhab
When you choose to install an add-on, openHAB will download it from the internet on request. If you plan on disconnecting your machine from the internet, then you will want to also install the add-ons package.
sudo yum install openhab-addons
# Arch Linux
The Arch User Repository (AUR (opens new window)) is a community-driven repository for Arch users.
It contains package descriptions (PKGBUILDs) that allow you to compile a package from source with makepkg and then install it via pacman.
There is a package description for stable releases of openHAB 3 (opens new window) in the AUR.
In order to create the package first make sure the necessary tools are installed.
sudo pacman -Sy --needed base-devel
Next clone the package description, change into the created directory, and make the package.
git clone https://aur.archlinux.org/openhab3.git
cd openhab3
makepkg -s
If all goes well, you'll end up with a package file which can be installed with pacman.
sudo pacman -U openhab3-3.0.0.M4-1-any.pkg.tar.zst
If everything went well, you can start openHAB and register it to be automatically executed at system startup.
# Systems based on sysVinit (e.g. Ubuntu 14.x, Debian Wheezy and older):
sudo /etc/init.d/openhab start
sudo /etc/init.d/openhab status

sudo update-rc.d openhab defaults
# Systems based on systemd (e.g. Debian 8, Ubuntu 15.x, Raspbian Jessie and newer):
sudo systemctl start openhab.service
sudo systemctl status openhab.service

sudo systemctl daemon-reload
sudo systemctl enable openhab.service
The first start may take up to 15 minutes, this is a good time to reward yourself with hot coffee or a freshly brewed tea!
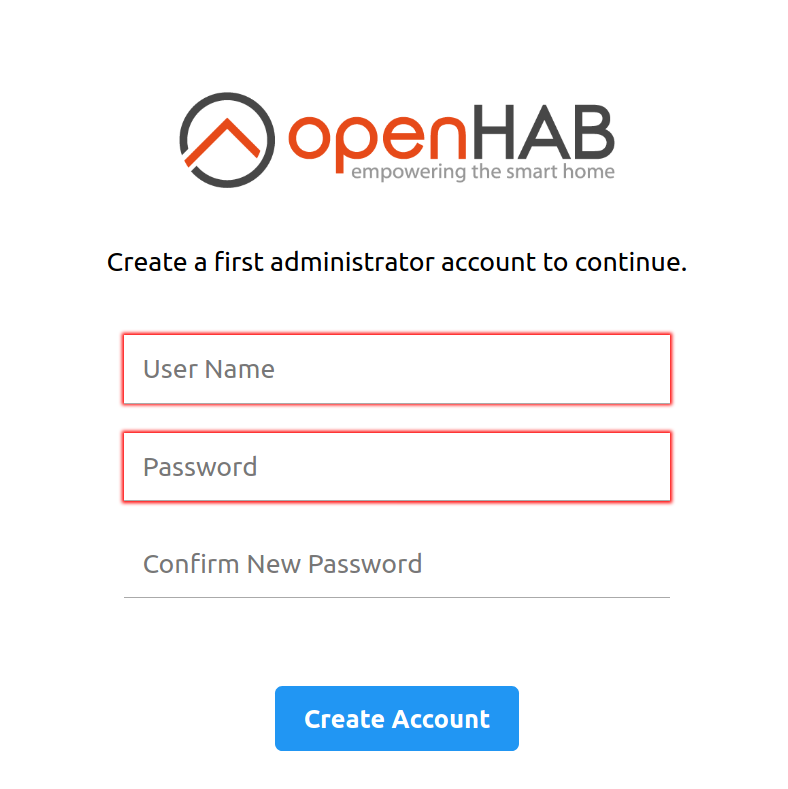
You should be able to reach the openHAB Dashboard at http://openhab-device:8080 at this point.
If you're new to openHAB, then you should checkout the beginner's tutorial!
# Service Control
openHAB will run as a service in the background. The most important commands to control the openHAB service are given below.
# Systems based on sysVinit (e.g. Ubuntu 14.x, Debian Wheezy and older):
# Learn about the current service status
sudo /etc/init.d/openhab status

# (Re-)Start openHAB (background service)
sudo /etc/init.d/openhab restart

# Stop the openHAB background service
sudo /etc/init.d/openhab stop

# Make openHAB automatically start after booting the Linux host
sudo update-rc.d openhab defaults
# Systems based on systemd (e.g. Debian 8, Ubuntu 15.x, Raspbian Jessie and newer):
# Learn about the current service status
sudo systemctl status openhab.service

# (Re-)Start openHAB (background service)
sudo systemctl restart openhab.service

# Stop the openHAB background service
sudo systemctl stop openhab.service

# Get the service log since the last boot
sudo journalctl -u openhab.service -b

# Make openHAB automatically start after booting the Linux host
sudo systemctl daemon-reload
sudo systemctl enable openhab.service
# Command Line Interface (CLI)
After installing openHAB, a shortcut named openhab-cli provides access to the openHAB-specific commands (such as backup, restore, and console).
To use the shortcuts in a terminal, simply type openhab-cli followed by the command.
For example:
Usage:  openhab-cli command [options]

Possible commands:
  start [--debug]     -- Starts openHAB in the terminal.
  stop                -- Stops any running instance of openHAB.
  status              -- Checks to see if openHAB is running.
  console             -- Opens the openHAB console.
  backup [filename]   -- Stores the current configuration of openHAB.
  restore filename    -- Restores the openHAB configuration from a backup.
  showlogs            -- Displays the log messages of openHAB.
  info                -- Displays distribution information.
# Changing Versions
To stay up to date with new releases, you should do regular upgrades. This is especially important if you are working with the latest snapshot as changes and fixes are incorporated constantly.
Your personal configuration will be retained on upgrades. We still recommend a backup before each upgrade.
# Apt Based Systems
Upgrading is as easy as:
sudo apt-get update
sudo apt-get upgrade
You may want to switch to a different repo, or an older (but more stable) version of openHAB. To do this, simply select the repo as in the installation instructions above, then find the version by bringing a list of all versions available to install:
sudo apt-get update
apt-cache showpkg openhab
Once you know which version you want, you can upgrade/downgrade to it by using the apt-get install openhab=[version] command, for example:
sudo apt-get install openhab=3.0.0-1
# Yum or Dnf Based Systems
Upgrading is as easy as: (you can use dnf instead of yum for systems that support it)
sudo yum upgrade
You may want to switch to a different version of openHAB. To do this, simply select the repo as in the installation instructions above, then find the version by bringing a list of all versions available to install:
rpm -q openhab
Once you know which version you want, you can upgrade/downgrade to it by using the yum install openhab-[version] command, for example:
sudo yum install openhab-3.0.0-1
# Uninstall
To uninstall openHAB and get rid of all related files managed by the package manager, make a backup, then uninstall openHAB and remove the repository:
# Apt Based Systems
sudo apt-get purge openhab*
sudo rm /etc/apt/sources.list.d/openhab.list
# Yum or Dnf Based Systems
sudo yum remove openhab*
sudo rm /etc/yum.repos.d/openhab.repo
# Manual Installation
The manual installation/setup is an alternative to the otherwise recommended installation through package repository.
First, create a Linux system user for openHAB. This user will later serve to execute the openHAB runtime with restricted permissions and can be used by other services like Samba if desired.
sudo adduser --system --no-create-home --group --disabled-login openhab
We are going to download a platform independent archive file and extract it to the path /opt/openhab.
Choose between the latest Beta release or a Snapshot with all incoming contributions, created daily.
As openHAB is still in an evolving state, the snapshot may be the preferred choice.
Official Release
Download and extract the latest offical stable version of openHAB from our downloadpage (opens new window) to your host:
cd /tmp
wget -O openhab-download.zip https://www.openhab.org/download/releases... # Insert download link here
sudo unzip openhab-download.zip -d /opt/openhab
rm openhab-download.zip
Beta/RC Release
If available, beta or release candidate builds of openHAB can also be downloaded from our downloadpage (opens new window) and extracted to your host as shown above.
Snapshot Release
Download and extract the latest snapshot version of openHAB from our downloadpage (opens new window) to your host. The process is analogue to above.
The extracted openHAB files should belong to the earlier created openhab user.
Execute:
sudo chown -hR openhab:openhab /opt/openhab
Everything is ready for a first test run.
Execute openHAB and you should be able to reach the openHAB Dashboard at http://openhab-device:8080 after a few minutes:
# execute as restricted user openhab:
sudo su -s /bin/bash -c '/opt/openhab/start.sh' openhab
You will see the openHAB Console in your terminal and can directly interact with it. Please be aware, that openHAB will need a few minutes so finish the first start, even after the openHAB console is visible. Let openHAB settle for around 15 minutes. If the portal is not reachable by then, restart once.
An important downside of the above method is, that openHAB will be terminated, as soon as you close your terminal. To work around that, a quick solution is, to execute openHAB in a detached screen (opens new window) terminal.
A cleaner approach is to create a Linux service.
# Service
The following instructions are intended for a Linux init system based on systemd (e.g. Debian 8 / Ubuntu 15.x and newer).
This will allow you to register openHAB as a service, so that it runs at startup and automatically restarts if openHAB crashes.
The service will be running with the privileges of the user "openhab" and expects the openHAB files under /opt/openhab.
Create the file /usr/lib/systemd/system/openhab.service with the following content:
[Unit]
Description=openHAB - empowering the smart home
Documentation=https://www.openhab.org/docs/
Documentation=https://community.openhab.org
Wants=network-online.target
After=network-online.target

[Service]
User=openhab
Group=openhab

WorkingDirectory=/opt/openhab
#EnvironmentFile=-/etc/default/openhab

ExecStart=/opt/openhab/runtime/bin/karaf daemon
ExecStop=/opt/openhab/runtime/bin/karaf stop
Restart=on-failure
SuccessExitStatus=0 143

[Install]
WantedBy=multi-user.target
Next, enable the service to be executed on system startup, start the service and retrieve status information:
# initialize the new service (execute only once)
sudo systemctl daemon-reload
sudo systemctl enable openhab.service

#start and retrieve status
sudo systemctl start openhab.service
sudo systemctl status openhab.service
The output of status after a successful execution should be similar to:
 openhab.service - openHAB - empowering the smart home
   Loaded: loaded (/usr/lib/systemd/system/openhab.service; enabled)
   Active: active (running) since Thu 2016-08-14 01:16:00 GMT; 18h ago
     Docs: https://www.openhab.org/docs/
           https://community.openhab.org
# Installing add-ons
When running a manual installation, it is possible to pre-download add-ons or legacy add-ons if you want to install any bindings at a later date without connecting to the internet.
Simply download the kar files (the latest builds can be found here (opens new window)) and move them to the /opt/openhab/addons folder.
# Upgrade
To stay up to date with new releases, you should do regular upgrades of your manual installation. This is especially important if you are working with the latest snapshot as changes and fixes are incorporated constantly (opens new window).
openHAB uses a script to update to any other version, or from stable to snapshot and visa-versa. Your personal configuration will be retained on upgrades, but you should stop openHAB and perform a backup first.
Versions 2.1.0 and Above
From version 2.1.0, openHAB is distributed with the update script included. This script should be called from within openHAB's root directory. Assuming the openHAB directory is in
/opt/openhab, simply run the following commands to update to the next major version of openHAB:cd /opt/openhab sudo runtime/bin/updateYou can also specify any version as a parameter. For example, to switch back to 2.0.0:
sudo runtime/bin/update 2.0.0You may also change to openHAB's more frequent, but less stable snapshot builds. Just append "-SNAPSHOT" to the target version, e.g.:
sudo runtime/bin/update 2.2.0-SNAPSHOTOlder Versions
If you're using a version earlier than 2.1.0, then you can use the following commands in Terminal to download the script and run it. Assuming the openHAB directory is in
/opt/openhab:cd /opt/openhab sudo sh -c "$(curl -fsSL https://raw.githubusercontent.com/openhab/openhab-distro/main/distributions/openhab/src/main/resources/bin/update)" -- 2.1.0
# Uninstall
To uninstall (or more precisely remove) openHAB after being manually set up, take a backup if needed and then simply stop and deactivate the openHAB service and get rid of all files:
sudo systemctl stop openhab.service
sudo systemctl disable openhab.service
sudo rm -rf /opt/openhab/
sudo rm /usr/lib/systemd/system/openhab.service
sudo rm /lib/systemd/system/openhab.service
sudo systemctl daemon-reload
# File Locations
| Repository Installation | Manual Installation (according to guide) | |
|---|---|---|
| openHAB application | /usr/share/openhab | /opt/openhab |
| Additional add-on files | /usr/share/openhab/addons | /opt/openhab/addons |
| Site configuration | /etc/openhab | /opt/openhab/conf |
| Log files | /var/log/openhab | /opt/openhab/userdata/logs |
| Userdata like rrd4j databases | /var/lib/openhab | /opt/openhab/userdata |
| Backups folder | /var/lib/openhab/backups | /opt/openhab/backups |
| Service configuration | /etc/default/openhab | (not preconfigured) |
# Backup and Restore
It is recommended to make a backup of your configuration before any major change.
To make a backup of openHAB 2 or higher, you need to retain your configuration and userdata files.
openHAB comes with scripts for storing your configuration in a zip file which is saved in /var/lib/openhab/backups for automatic installs and openhab/backups for manual installs.
You can change the default path by setting the $OPENHAB_BACKUPS environment variable.
sudo $OPENHAB_RUNTIME/bin/backup
## OR ##
sudo $OPENHAB_RUNTIME/bin/backup /path/to/backups/folder/myBackup.zip
To restore from these generated files:
sudo $OPENHAB_RUNTIME/bin/restore $OPENHAB_BACKUPS/myBackup.zip
If you're unsure how to use the above files, just use --help or -h:
$OPENHAB_RUNTIME/bin/backup --help
# Viewing Log Messages
You can learn more about openHAB and how it works by looking at your log files. These will tell you everything you might need to know. Execute the following command in one session or have both files separated in sessions side by side:
Package repository based installation:
tail -f /var/log/openhab/openhab.log -f /var/log/openhab/events.logManual installation:
tail -f /opt/openhab/userdata/logs/openhab.log -f /opt/openhab/userdata/logs/events.log
You could even set up an SSH configuration (in Putty or similar) to automatically connect and execute the commands every time you start working on your setup.
With openHAB you can also use the openHAB console to have a colored glance at the logging information.
# Recommended Additional Setup Steps
The following is not directly related to the openHAB installation but rather recommended on an openHAB system. The need for these and the exact implementation on a specific system might differ from user to user.
# Privileges for Common Peripherals
An openHAB setup will often rely on hardware like a modem, transceiver or adapter to interface with home automation hardware.
Examples are a Z-Wave, Enocean or RXFcom USB Stick or a Raspberry Pi add-on board connected to the serial port on its GPIOs.
In order to allow openHAB to communicate with additional peripherals, it has to be added to corresponding Linux groups.
The following example shows how to add Linux user openhab to the often needed groups dialout and tty.
Additional groups may be needed, depending on your hardware and software setup.
sudo adduser openhab dialout
sudo adduser openhab tty
If you are looking to enable sound privileges for openHAB, it will also be necessary to add openHAB to the "audio" group.
sudo adduser openhab audio
# Java Network Permissions
The Java Virtual Machine hosting openHAB is restricted in its permissions to interact on network level for security reasons. Some openHAB add-ons like the network binding need elevated permissions to work. If needed, grant these permissions by executing the following command:
setcap 'cap_net_raw,cap_net_admin=+eip cap_net_bind_service=+ep' $(realpath /usr/bin/java)
# Network Sharing
openHAB depends on configuration files and folders with custom content (details in Configuration articles). Because your openHAB installation most probably is stored on a remote device, being able to easily access and modify these files from your local PC or Mac is important. Therefore setting up a Samba (opens new window) network share is highly recommended.
The openHAB VS Code Extension software does also depend on a mounted share to access the openHAB configuration files.
We will now guide you through the Samba network shares setup process. Start by installing Samba. Afterwards open its configuration file in your favorite editor:
sudo apt-get install samba samba-common-bin
sudo vim /etc/samba/smb.conf
Change the workgroup name if needed, otherwise uncomment and enable WINS support:
wins support = yes
Next, add the desired share configurations to the end of the file:
Package repository based installation:
[openHAB-userdata]
  comment=openHAB userdata
  path=/var/lib/openhab
  browseable=Yes
  writeable=Yes
  only guest=no
  public=no
  create mask=0777
  directory mask=0777

[openHAB-conf]
  comment=openHAB site configuration
  path=/etc/openhab
  browseable=Yes
  writeable=Yes
  only guest=no
  public=no
  create mask=0777
  directory mask=0777

[openHAB-logs]
  comment=openHAB logs
  path=/var/log/openhab
  browseable=Yes
  writeable=Yes
  only guest=no
  public=no
  create mask=0777
  directory mask=0777
Manual installation:
[openHAB-files]
  comment=openHAB
  path=/opt/openhab
  browseable=Yes
  writeable=Yes
  only guest=no
  public=no
  create mask=0777
  directory mask=0777
Save and close the samba configuration file.
The shares are configured to be not open for guests nor to the public. Let's activate the "openhab" user as a samba user and set his password (e.g. "habopen"):
sudo smbpasswd -a openhab
Be aware, that creating and later using a specific user will ensure, that permissions are honored. Make sure, the "openhab" user has ownership and/or write access to the openHAB configuration files. This can be accomplished by executing:
sudo chown -hR openhab:openhab /etc/openhab /opt/openhab/conf
Finally check the configuration file for correctness and restart Samba to load the new settings:
samba-tool testparm

# Linux init systems based on sysVinit
sudo service smbd restart
# Linux init systems based on systemd
sudo systemctl restart smbd.service
# Mounting Locally
After setting up and restarting Samba, check your connection to the shared folder and create a permanent mount. Check the network devices manager of your local operating system to find and access your openHAB host and share. These might however not be auto-discovered. You can also manually connect:
- On macOS: Open Finder → Go → Connect to Server:
smb://[email protected] - On Windows: Open Windows Explorer → Address bar:
\\openhab-device.local→ Right click a share and assign a drive letter
Be sure to use the actual host name instead of openhab-device.
When asked, authenticate with the username "openhab" and the chosen password.
If you are not able to connect, try with the IP of your device (e.g. smb://[email protected] or \\192.168.0.2).
If everything went well, you are set and ready to start configuring your openHAB system.